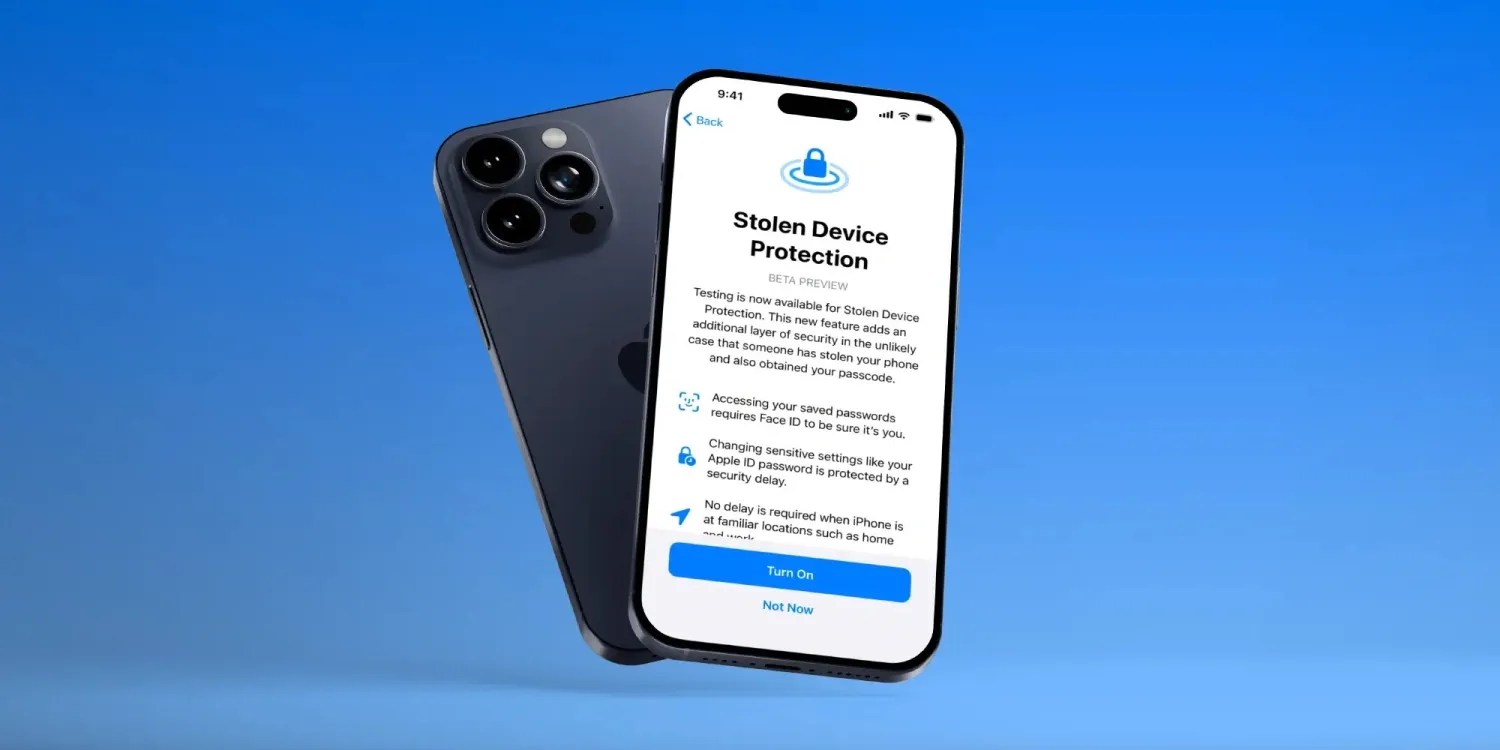
An important new security feature for iPhone has arrived to test with the iOS 17.3 beta that gives you protection in the event your device is stolen. Join along for a look at how to turn on iPhone Stolen Device Protection and also some advice on whether or not you should use the feature.
With the first iOS 17.3 beta, Apple launched the ability to test out iPhone Stolen Device Protection. The feature comes after WSJ’s Joanna Stern investigated a rise in iPhone thefts in public places like bars. The approach typically saw attackers observing victims entering their passcodes before stealing their iPhones and then using that to immediately change their Apple ID password and lock the owners out of their accounts and even iCloud backups.
Notably, Joanna even interviewed an iPhone thief who was able to take more than $300,000 from victims using this attack.
Fortunately, iPhone Stolen Device Protection solves the problem by requiring biometric authentication when away from trusted places like home and work. It also includes a time delay for a second biometric authentication for certain sensitive actions.
Check out more details on how exactly it works in our full coverage:
Should you turn on iPhone Stolen Device Protection?
Short answer, yes. Here’s more context…
- The brilliant thing about Stolen Device Protection is that there’s very little downside to the user experience while providing a great boost to security.
- After turning the feature on, if you end up in an unlikely situation where Face ID or Touch ID isn’t working:
- You can keep using your device for texts, calls, and most functions – you just won’t be able to do sensitive actions like changing Apple ID password, changing the passcode or Face ID/Touch ID, seeing saved passwords, etc.
- You can turn Stolen Device Protection off with your passcode when back at a familiar location like home before you get your iPhone repaired
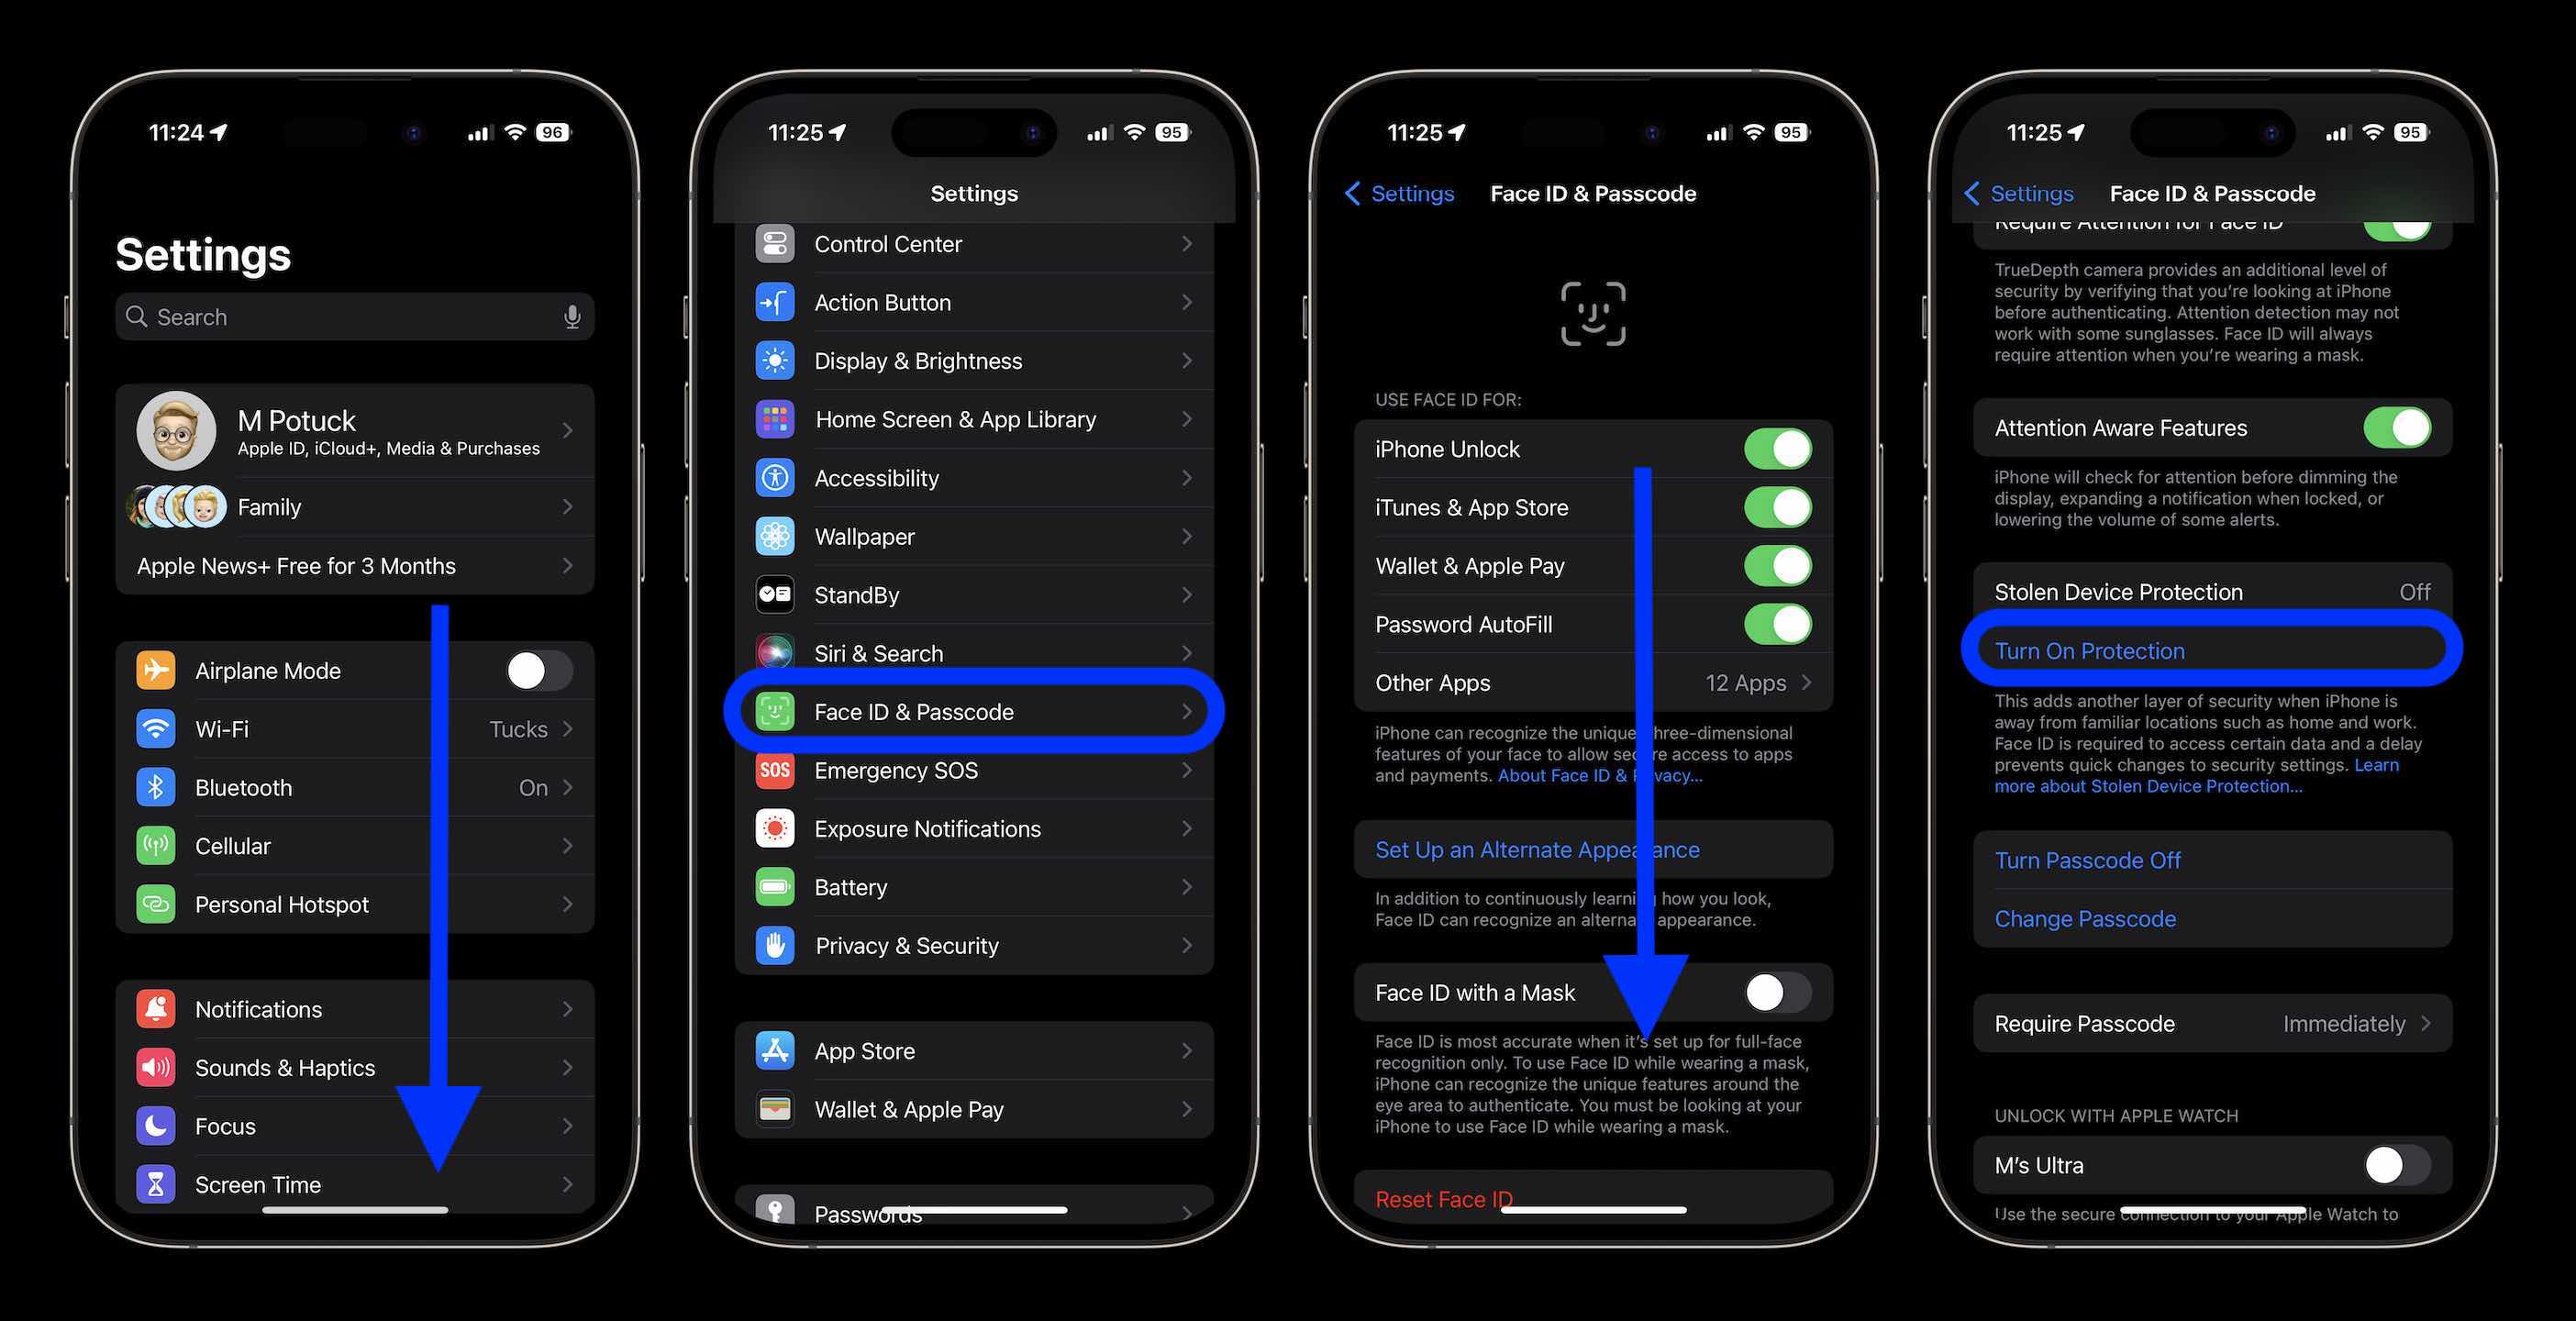
How to turn on iPhone Stolen Device Protection
- Make sure you’re running the iOS 17.3 beta on your iPhone (beta installation guide)
- Open the Settings app
- Swipe down and tap Face ID & Passcode (or Touch ID & Passcode)
- Now under Stolen Device Protection tap Turn On Protection
That’s it!
As mentioned above, if you need to turn it off after the rare event of breaking or damaging your Face ID TrueDepth camera or Touch ID sensor, you can use your passcode to do that when at a trusted location.
Check out more on Stolen Device Protection in my colleague Fernando’s video:
Good practices in public
Even with this feature turned on, here are a few best practices to keep in mind:
- Don’t hand your iPhone over to strangers to get their contact info, connect on social media, etc.
- Don’t enter your passcode in public, instead use Face ID or Touch ID
- If you’re not using your iPhone, put it away in a pocket, bag, or purse
- Don’t connect to open, public WiFi networks
- Don’t use public phone chargers if at all possible
Read more tutorials from 9to5Mac:
FTC: We use income earning auto affiliate links. More.
An important new security feature for iPhone has arrived to test with the iOS 17.3 beta that gives you protection in the event your device is stolen. Join along for a look at how to turn on iPhone Stolen Device Protection and also some advice on whether or not you should use the feature.
With the first iOS 17.3 beta, Apple launched the ability to test out iPhone Stolen Device Protection. The feature comes after WSJ’s Joanna Stern investigated a rise in iPhone thefts in public places like bars. The approach typically saw attackers observing victims entering their passcodes before stealing their iPhones and then using that to immediately change their Apple ID password and lock the owners out of their accounts and even iCloud backups.
Notably, Joanna even interviewed an iPhone thief who was able to take more than $300,000 from victims using this attack.
Fortunately, iPhone Stolen Device Protection solves the problem by requiring biometric authentication when away from trusted places like home and work. It also includes a time delay for a second biometric authentication for certain sensitive actions.
Check out more details on how exactly it works in our full coverage:
Should you turn on iPhone Stolen Device Protection?
Short answer, yes. Here’s more context…
- The brilliant thing about Stolen Device Protection is that there’s very little downside to the user experience while providing a great boost to security.
- After turning the feature on, if you end up in an unlikely situation where Face ID or Touch ID isn’t working:
- You can keep using your device for texts, calls, and most functions – you just won’t be able to do sensitive actions like changing Apple ID password, changing the passcode or Face ID/Touch ID, seeing saved passwords, etc.
- You can turn Stolen Device Protection off with your passcode when back at a familiar location like home before you get your iPhone repaired
How to turn on iPhone Stolen Device Protection
- Make sure you’re running the iOS 17.3 beta on your iPhone (beta installation guide)
- Open the Settings app
- Swipe down and tap Face ID & Passcode (or Touch ID & Passcode)
- Now under Stolen Device Protection tap Turn On Protection
That’s it!
As mentioned above, if you need to turn it off after the rare event of breaking or damaging your Face ID TrueDepth camera or Touch ID sensor, you can use your passcode to do that when at a trusted location.
Check out more on Stolen Device Protection in my colleague Fernando’s video:
Good practices in public
Even with this feature turned on, here are a few best practices to keep in mind:
- Don’t hand your iPhone over to strangers to get their contact info, connect on social media, etc.
- Don’t enter your passcode in public, instead use Face ID or Touch ID
- If you’re not using your iPhone, put it away in a pocket, bag, or purse
- Don’t connect to open, public WiFi networks
- Don’t use public phone chargers if at all possible
Read more tutorials from 9to5Mac:
FTC: We use income earning auto affiliate links. More.